Your First Interaction
In this tutorial, you build a button that logs a message when it is clicked. It takes 5 minutes and covers the basics of every Luna Park app: a layout, an event, and a graph.
The short version: add a button, add a Click event to it, open the Logic view, connect a Log node.
You can follow along in the playground editor, no account needed.
1. Create a page
The button comes from the Nuxt UI plugin. It is preinstalled in the Nuxt project template. Otherwise, open Libraries in the top bar, then Install plugins, select Nuxt UI and click Install plugin.
In the Explorer (top left), right-click the Root folder, then New > Page. Name it Home.
The page opens in Builder mode: the canvas in the middle, the layout tree at the bottom left, and the inspector on the right.
2. Add a button
- In the layout tree, click the list button under the root Block, then pick Nuxt UI > Element > Button. The button is added and selected.
- In the Element panel of the inspector, set Name to
Hello button. - In the Properties panel, set label to
Say hello.
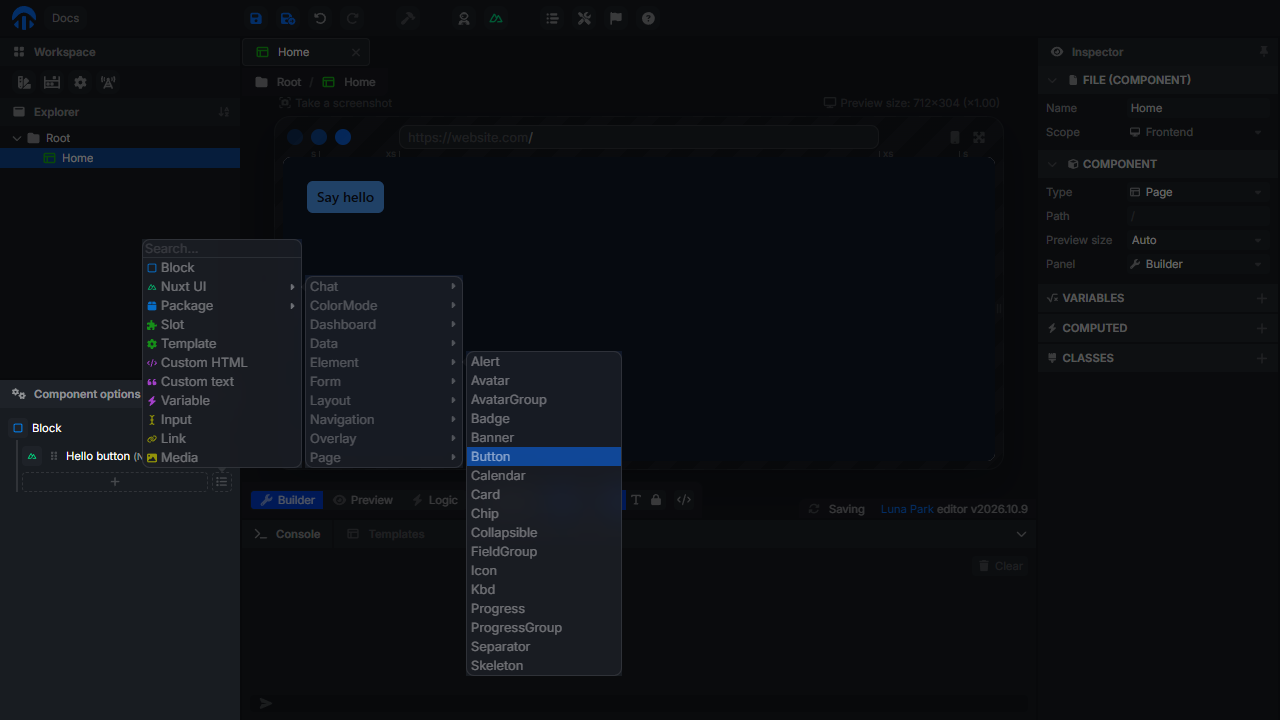
See Builder for the other ways to insert elements.
3. Add a Click event
Select Hello button again. In the Events panel of the inspector, click + and pick Click.
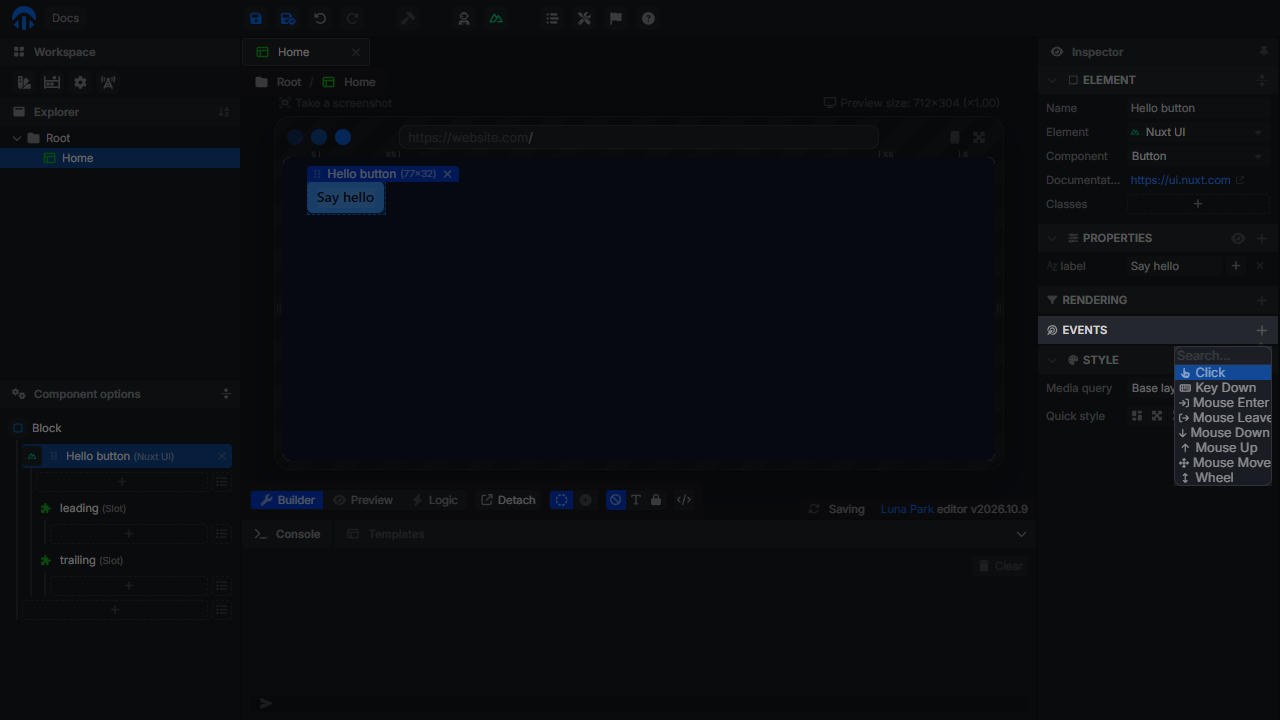
4. Open the Logic view
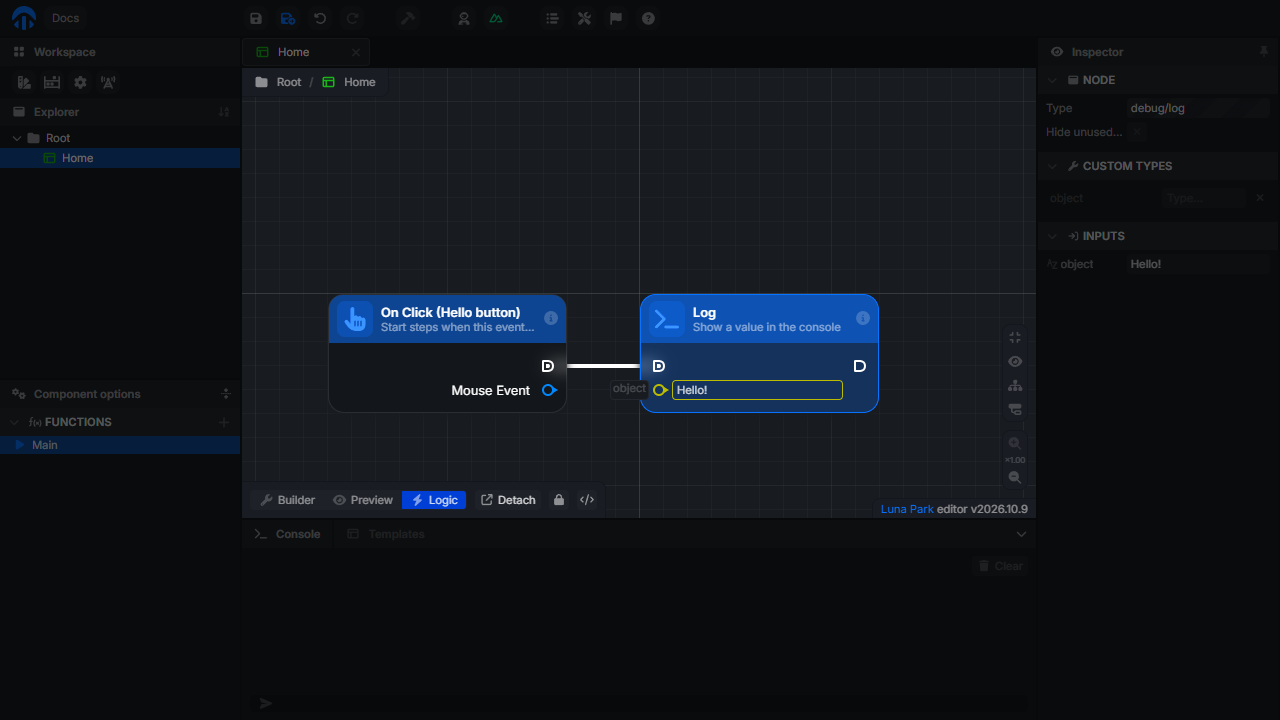
Click Edit logic next to the event. The main view switches to Logic mode and shows the On Click (Hello button) node. Everything connected to its execution output runs when the button is clicked.
5. Connect a Log node
- Right-click the graph and search for
log. Pick Log, in the Debug category. - Drag a wire from the execution output (the square anchor) of
On Click (Hello button)to the execution input of Log. - Type
Hello!in the object input of Log.
Try it
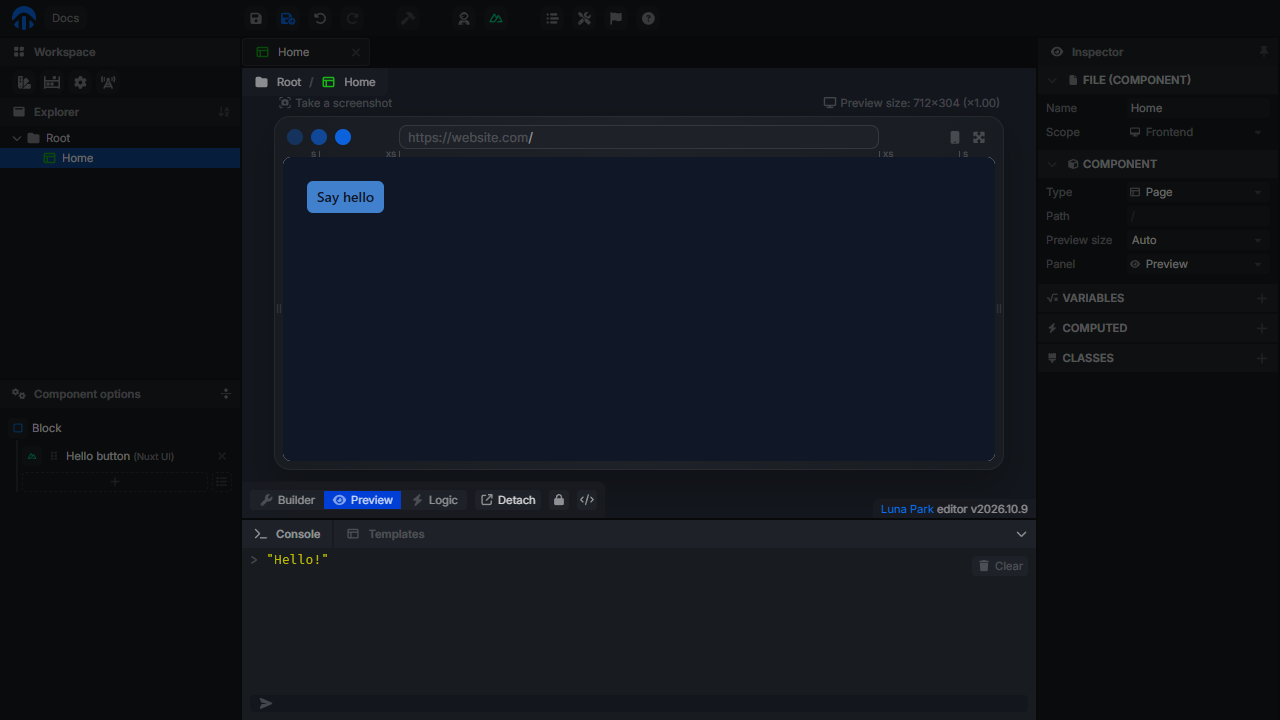
Switch to Preview mode, and click Say hello. "Hello!" appears in the Console at the bottom of the editor, and in your browser's console.
Going further
- Log the mouse position: connect the Mouse Event output of the event node to a
Get Propertynode with the pathclientX, and log its value. See Events for every event and its outputs. - Count the clicks: add a
countvariable to the page, then chainSet count(withcount + 1) before Log. This is the example of The Graph. To share the counter between pages, use a store. - Display the value: add a Variable element bound to
countto see it update on the page.